Maintain Prospects/Customers in Peach Tree Software
After making the chart of accounts we then maintain the record of our Prospects/Customers and to maintain the record we first open the Maintain Menu which is shown on top of the Peachtree screen when we open an existing company.

Click on the Maintain Menu and then open the first option which is Customers/Prospects. Open this file by clicking on it like this.

When you click on to the Customer/Prospects we have the following screen.

In Maintain Customers menu we maintain the records of our customers by giving them ID and Name and provide the following information of our customers which includes General, Sales Default, Payments Defaults, Custom Fields and History.
Before we record the Customer’s ID and the Name of the Customer and save it we firstly have to record the General Ledger Sales Account which is on the Sales Default Menu. We first select the Account which we have created in Charts of Accounts step we select an account from it as a GL Sales Account and then we will be able to save the Customer Name and ID. If we do not save the GL Sales Account and try to save the Customer ID and Name the software give the following error so to avoid this we first make a GL Sales Account.

In the first step we record General Information about the customers in the General menu we record the Contact ,Address ,City ,State ,Zip ,Country ,Customer Type ,Telephone ,Fax, E-Mail , Web Site of the customer. An example of this General Information about the customer is shown in the following screen.

The Sales Default screen is in the following screen which is shown when we click on the Sales Defaults option.

 button and select the Sales Account.
Then we can add the Purchase Order Number in Open P.O #. After Purchase order we can provide the Ship Via in which we mention through which source we are going to send the order to our Customers, after it we select the Resale #, Pricing Level and choose terms for which we give discount to our customers. After completing the above information we then move on towards our next screen which is Payment Defaults and is shown below

In the third step we mainly Record the information about the Cardholder’s Name, Address, City, State, Zip Code, Country Name, Credit Card Number, Expiry Date of Credit Card and also select the method of the payment. After this information we now more on to our next step which is Custom Fields Option and is shown in the following screen

In this step we record main and important points related to our customers important information like any other Contact Number, Reference, Mailing List, Multiple Sites of the customer, etc, we can save any type of 5 other information in the Custom Field we can also change the information related to our Customers. After saving some important information about our customer we then move on to the last step of the Customers/Prospects information the Screen of the History is shown below.

In this step we note the information about how long the customer is dealing with us, last invoice which we sent to the customer , payment date ,mode of payment etc. so that we know that the Customer is dealing with us some times or the customer is regular .After recording these kinds of information our Step to Maintain the Customers/Prospects is completed. We then SAVE the customer account by clicking on the button which is shown above in the Maintain Customers screen.
button which is shown above in the Maintain Customers screen.After Maintaining a Customer account and saving it we then enter the beginning balances of the customers. This option will be shown when we save an Account of a Customer.

We then by clicking on the option can enter the beginning balance of a customer.
option can enter the beginning balance of a customer.
We first enter the Invoice Number, then we enter the date in which we first write the month then date and then year i.e. 06,28,2009.After entering the date we then Enter purchase order number and amount. At last we enter the A/R Account i.e. we choose the Account Receivable Account which we have already made in the Chart of Accounts menu and select the account in this option and then save it by clicking on thebutton which is shown in the above screen of the Customer Beginning Balance Screen.
button which is shown in the above screen of the Customer Beginning Balance Screen.Delete a Customer:
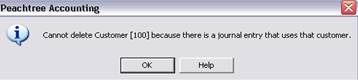
We can delete an existing Customer Account By selecting the ID which we want to delete and then click on the delete button after selecting the Account which we want to delete. The Delete option is in the above Screen of the Maintain Customers. But to delete a customer account the beginning balance if saved for the customer is removed from the Customer Beginning Balance Screen and then we select the customer which we want to delete and then we Delete the customer if we do not remove the beginning balance we are not able to delete the customer ID and the following error will be shown
Change ID of A Customer:
We can change the existing ID of a customer by giving it another ID that is done by clicking on the Change ID option which is on the above screen of the maintain customers. We first select the Customer whose ID we want to change we then by selecting the customer click on the button. The following screen is shown after clicking the button.
button. The following screen is shown after clicking the button.
We Enter the New Customer ID e.g. 120 is the new ID which we want to give to the Customer we write it in front of the Enter New Customer ID option and then click the OK option that is how we can change our Customer ID.
This is how we Maintain Customer Accounts in Peach tree Software
I really liked your Information. Keep up the good work. Bad debt protection
ReplyDelete